
Valves | Orifices
-
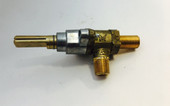
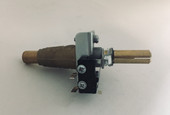
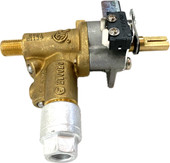
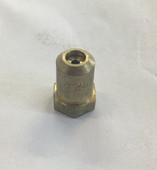
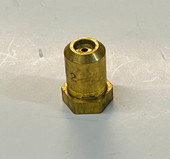
 Lynx, Sedona Main Burner Valve w Micro Switch - 33339Part #:Brand:
$46.33
-
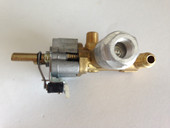
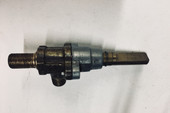
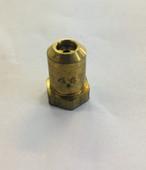
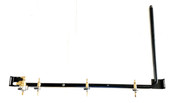
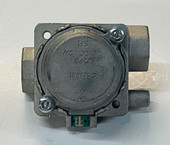
 31442 Lynx Main Burner ValveBrand:
$58.03
-

$159.00
-
$4.04
-
$10.78
-
$82.51
-
$109.00$94.00 -
$46.33
-

$119.00$104.00 -

$10.94
-
$4.20
-
$4.20
-
$4.90
-
 Lynx ProSear Valve - 30180Brand:
$31.58
-
$60.07
-
$86.91
-

$4.20
-
$4.59
-

$4.76
-
$19.83
-
$4.59
-
$66.28
-
$15.47
-
$13.82
-
$11.48
-
$15.24
-
$6.83
-
$24.88
-
$24.66
-
$119.00
-
$5.42
-
$15.47
-
$321.69
-

$280.34
-
$278.69
-
$9.18
-

$12.03
-
$17.46
-
$339.21
-
$144.01
-

$313.89
-
-
$11.32
-
-

-
$155.00
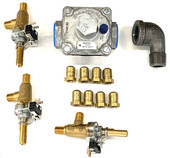
Lynx grill gas valves control gas flow to your burners. In humid or coastal environments, a valve stem can seize over time. Before replacing anything, you can try a careful “free-up” attempt: spray a small amount of penetrating lubricant around the stem (not into the firebox), wait a few minutes, then gently work the knob back and forth. Do not force it—if the valve won’t turn smoothly, it’s safer to replace the valve than risk damage to the stem or manifold.
Finding the Right Replacement Valve or Orifice
Step 1: Identify your grill by serial number. Lynx used multiple valve styles over the years—your serial number is the fastest way to match the correct part. Start here: Locate your serial number.
Step 2: Confirm the valve type by inspection. If needed, remove the control panel and visually match the valve style. (This is especially helpful if the grill has been rebuilt over the years.)
Step 3: Choose the valve you need.
- Main Burner Valve
- Rotisserie Valve
- ProSear Valve
- Safety Valve
- Smoker Burner Valve
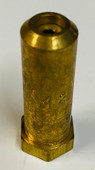
Step 4: Do you have your original orifice?
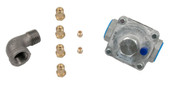
Valves typically do not include orifices. In most cases you’ll re-use your original orifice. Orifices are usually only replaced when:
- Converting gas type (Natural Gas ↔ Propane)
- The original orifice is missing or damaged
Step 5: Order what you need from TheBBQDepot.com. Once your parts arrive, follow the steps below to install safely.
How to Replace a Main Burner Valve on a Lynx Grill
PRO Tip: Before replacing a valve or orifice, inspect the manifold for corrosion, soft spots, or pinholes. If a manifold is compromised, replacing only the valve won’t solve the issue.
Important manifold note: On many 2005-and-older Lynx grills (Premier / early series), certain manifolds have been discontinued. On many 2006-and-newer grills, the manifold assembly may include the valves—and you’ll typically transfer your original orifice (or install a new one if needed).
- Turn off the gas supply at the source and confirm the grill is fully cool.
- Remove the control knobs and set them aside.
- Remove the control panel to access the valve/manifold.
- If your grill uses a valve with a microswitch (commonly 2006+), disconnect the ignition wires from the microswitch.
For many pre-2006 grills, you can remove the valve without dealing with a microswitch. - The valve threads into the manifold. Carefully unthread the old valve from the manifold.
- Apply yellow gas-rated PTFE tape (do not use white water-rated tape) or a gas-rated sealant like pipe stick to the valve threads (follow the sealant directions).
- Thread the new valve into the manifold and tighten securely (snug + aligned; do not overtighten).
- Reconnect ignition wires if applicable (microswitch models).
- Restore gas supply and leak-test every connection with soapy water. If bubbles form, stop and correct the leak before lighting.
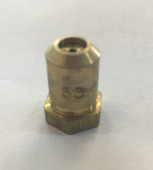
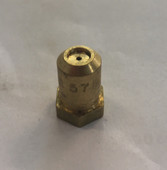
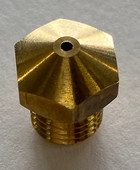
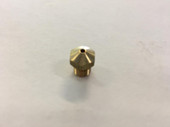
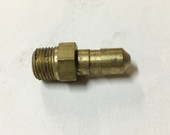
Orifice Reference by Type & Model
Premier Series Orifices (0,1)
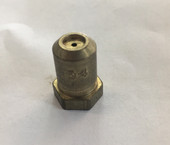
LBQ27 - ORIFICE, NG (#41 LONG) - 30329
LBQ27 - BURNER ORIFICE, LP (#53 LONG) - 30328
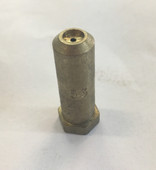
Orifices Series F-R
Main Burner
27,36 - BURNER ORIFICE, NG (#41 SHORT) - 13013
27,36 - BURNER ORIFICE, LP (#53 SHORT) - 13019
30,42,54 - BURNER ORIFICE, NG (#41 LONG) - 30329
30,42,54 - BURNER ORIFICE, LP (#53 LONG) - 30328
TRIDENT - BURNER ORIFICE, NG (#44 SHORT) - 13015
TRIDENT - BURNER ORIFICE, LP (#54 SHORT) - 13020
Sear Burner
J Series - SEAR ORIFICE, LP (#54 SHORT) - 13020
L42 - SEAR ORIFICE, NG - 13014
Rotisserie Burner
30,36,54 - IR ROTIS ORIFICE, NG (#50 SHORT) - 13016
30,36,54 - IR ROTIS ORIFICE, LP (#57 SHORT) - 13021
L27 - IR ROTIS ORIFICE, NG (#50 SHORT) - 13016
L27 - IR ROTIS ORIFICE, LP (#57 SHORT) - 13021
L42 - IR ROTIS ORIFICE, NG (#48 SHORT) - 30470
L42 - IR ROTIS ORIFICE, LP (#56 SHORT) - 31342
